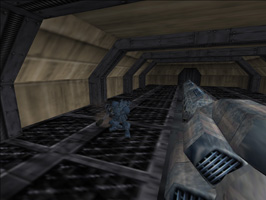
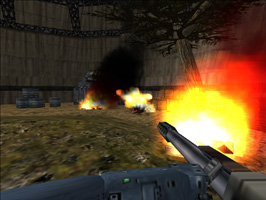
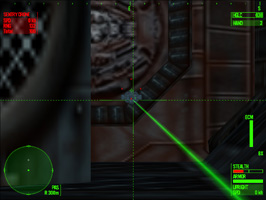
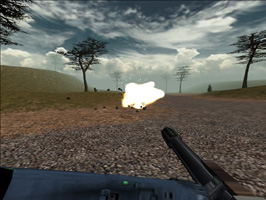
Heavy Gear II Walkthrough
Local Ditch > Heavy Gear > Heavy Gear II Walkthrough
Need a little help to get to that next stage in Heavy Gear II? Check it out here (or maybe use a cheat code). In this guide, you'll find the builds and strategies that I used to get through each level.
A word before beginning: You'll be asked to choose a Gear when you first start the game. This cannot be changed later, so make sure you pick one that fits your play style. I think at least a heavy is the way to go, though you may want to take an assault. Unfortunately, lighter gears cannot take many hits and that can make some missions extremely difficult.
Campaign Missions
1. Rendezvous with Calesto
Description
Description
Follow the Nav Points through the swamp and eliminate all GREL structures and units. The defecting GREL officer, Calesto, will meet you at the main compound.
The Black Talon Weapons Sergeant will set a Threat Value limit for all missions. This limit is based on available stores and mission requirements. Threat Value includes your squadmates, Gear modifications, weapons, and ammunition.
Background
Background
Intelligence operatives have uncovered key information on the bombing of Peace River. We've been contacted by a GREL officer by the name of Calesto. During the War of the Alliance the CEF created these Genetically Recombined Experimental Legionnaires (GREL), but the Earth forces abandoned their super soldiers when they pulled out of Terra Nova. The remaining GREL are being lead by a Jan class GREL named Proust. His purpose is to create a future in which GREL's no longer bow down to a lesser species such as homo-sapiens.
It seems that the GREL were involved with the bombing of Peace River. We have allowed these vat-grown monstrosities to remain on Terra Nova because we believed they were hostile to their former Earth masters. Apparently we made a mistake. But so have they. Calesto wishes to defect from Proust and claims to have information on the next bombing being planned by Proust and the Earth forces. In exchange for his liberation, Calesto has agreed to provide us with the information he possesses.
The plan is to make it appear that Calesto's platoon was destroyed by regular MILICIA patrols. This will allow Calesto to disappear without arousing Proust's suspicions. Calesto has provided us with the location and tactical strength of each squad in his outfit. Once you have destroyed the objectives at each Nav Point, rendezvous with Calesto and find out what he knows.
Debriefing
Debriefing
Our intelligence operatives have finished reviewing the data Calesto transmitted to Morgan. It informs us that Proust's next target is Marabou. He plans to smuggle another anti-matter device into the city before the week is out. The Hades will transport you to northern Terra Nova immediately. You'll receive further information when you arrive.
Proust, a suspect in the Peace River bombing, is a leader of GRELS (genetically modified humanoids living in Terra Nova). Life sucks for them. Calesto is tired of it and wants to help you. Help him by making it look like he's been taken prisoner while his base is raided.
Objectives
- Destroy all structures at each nav point
- Rendezvous with Calesto at the Main Compound
Walkthrough
The jist: Go through the navs, shoot the towers, head to the main compound, then destroy everything that's not Calesto.
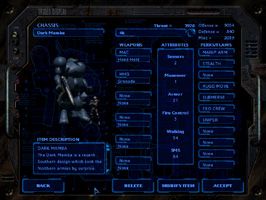
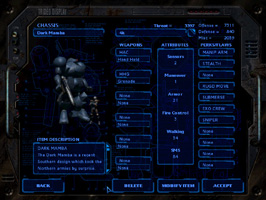
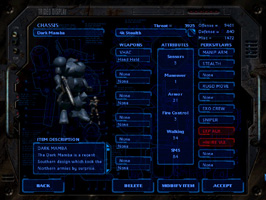
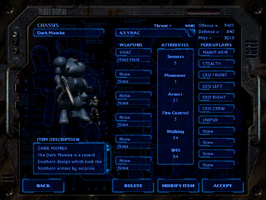
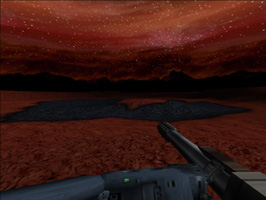
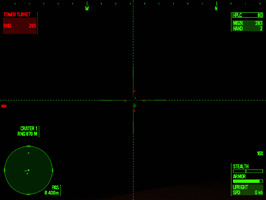
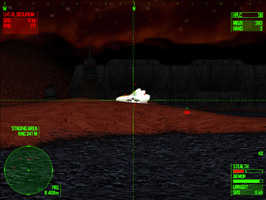
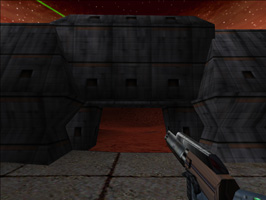
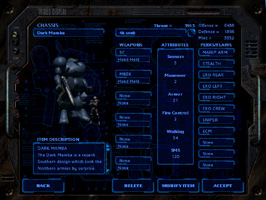
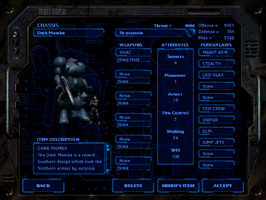
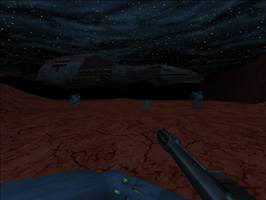
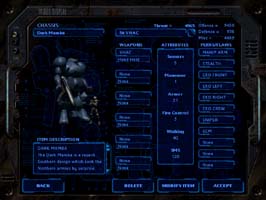
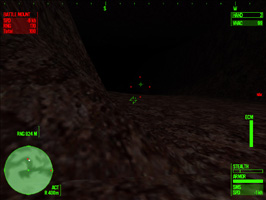
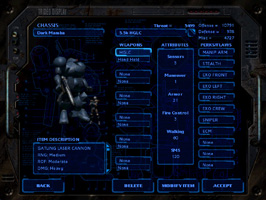
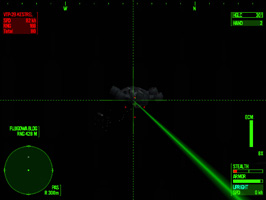
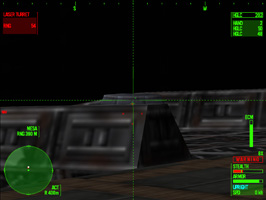
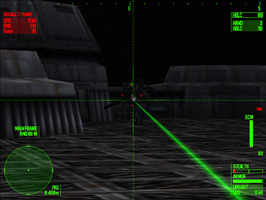
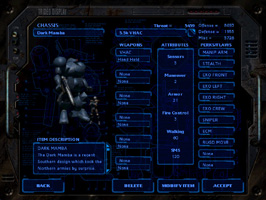
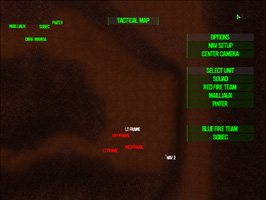
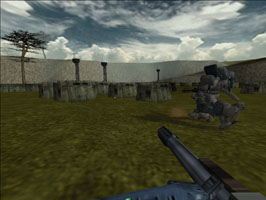
You can view my setup in the images. I cranked up the fire control to 3, stripped the Zero-G systems, and went with a medium rifle, though I probably should've used an AC as I prefer the faster fire rates and the damage is comparable.
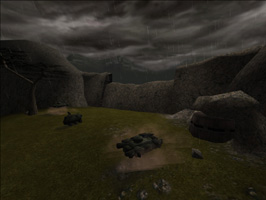
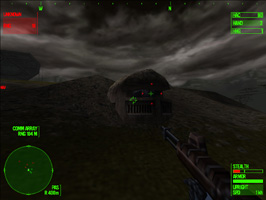
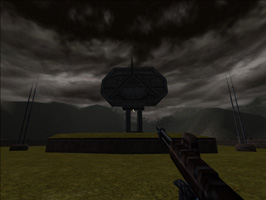
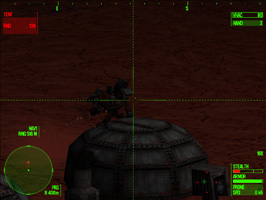
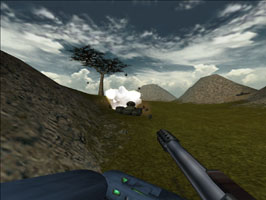
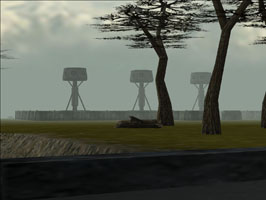
Head towards Nav 1. When you're about 250m out, zoom in and you'll see the first tower. Take it out from here. Infantry may fire, but they'll barely scratch you.
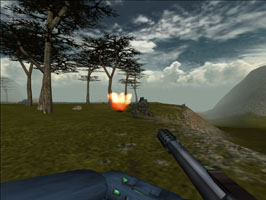
Head to Nav 2 and repeat. There's a missile launcher this time, so you'll probably want to attack it first. Same goes for Nav 3.
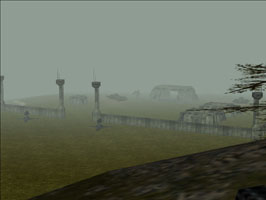
Between Nav 3 and the main compound, you'll find a gear hiding in the water. Blast it before it sees you. It typically goes down with just a few shots.
Once you reach the main compound, you'll talk with Calesto. Take out the tank ASAP. This is likely the hardest challenge in the level. If either you or Calesto are killed, the mission ends. (Do I need to mention "Don't shoot Calesto?") After the tank's gone, destroy all of the remaining buildings.
2. Assault NEC Outpost
Description
Description
Follow the Nav points to the CEF outpost and destroy it. Eliminate all Earth forces you encounter so we can prevent them from contacting Proust.
Background
Background
Calesto has given us a detailed account of how Proust's men smuggled the anti-matter device into Peace River, and we've verified the information. Proust will be meeting with Earth forces late this evening to discuss the details of their next operation. Our plan is to eliminate the Earth forces and assume their place at the rendezvous with Colonel Proust.
Proust's next target is Marabou. Now that we know who was behind the bombings we have come to realize the full significance of the incident. Peace River was the home of Paxton Arms, the largest weapons manufacturer on Terra Nova. Marabou is the location of the largest military base on the planet. The choice of targets indicates that Earth is trying to weaken Terra Nova's defenses in preparation for another war.
Needless to say, this operation has become the highest priority.
Debriefing
Debriefing
With the Earth forces out of the way, you'll move to the rendezvous point to meet Proust. We'll scan the area with our intel satellites and provide you with further information as it becomes available. You might need some help taking on Proust, so we're dispatching a squadmate of your choice to join you on your next mission.
Unfortunately, Peace River was just a sign of things to to come. It looks like Earth is trying to weaken Terra Nova and start another invasion. Thanks to Calesto, though, you know Proust will be meeting with the Earthers. The plan: Destroy Earth's secret base in the north and take their place.
Objectives
- Destroy the CEF outpost
- Eliminate all resistance you encounter
Walkthrough
This time around, I switched over to a medium autocannon. Much better!
This mission shouldn't be too bad. If you want, it is possible to stealth your away around the mountain ridge and skip the first round of infantry. Is it worth it? Probably not. It may spare you from destroying a few vehicles, though.
Instead, I'd just throw on the wheels and run right through the Nav points, stomping any infantry and occasionally lobbing some shots at them. You don't have to kill the infantry.
After a few navs, you'll encounter a Hunter. It should go down easily.
When you reach the outpost, two tanks will show up. Strafing around them should be enough to avoid their fire. A few AC rounds should tear them up. Demolish a few buildings (can switch to your fists for faster results) and it's a successful mission.
3. Ambush Colonel Proust
Description
Description
You will deploy at Nav1 and await Proust. When he arrives, our tanks will move to cut off his retreat at Nav2. Once the tanks are in position, take out Proust's escorts, and we'll capture him.
Background
Background
The GREL's were bred for combat. They are skilled and relentless. Our tanks won't last long against GREL piloted Gears, so you'll need to eliminate Proust's escorts quickly. Use available cover, and try to strike from a distance.
We've recovered some interesting data from the wreckage of the CEF outpost. Apparently, there's a hidden CEF base somewhere on Terra Nova, and the anti-matter devices are being stored there. We weren't able to determine the location of this base, but it's clear that eliminating Proust will not prevent further bombings. We need to locate the Earth forces and eliminate them.
We'll capture Proust and ransom him to his GREL comrades. Unless they provide us with the location of the CEF base, Proust be will be tried as a war criminal and publicly executed.
Remember we need Proust alive. Don't attack him under any circumstances.
Debreifing
Debriefing
As expected, the GREL's were more than willing to roll over on their human partners in exchange for the return of their leader. Unfortunately, even they don't know the exact location of the CEF installation. Apparently, their Earth contacts were wise enough not to trust them any more than was necessary. The GREL do know that the base is hidden in a remote stretch of the Tershaw mountain range and that there are regular CEF patrols scouting the area. We should be able to locate one of these patrols and tail them to the facility.
You are to depart for the Tershaw Range in the Hades immediately. The remaining pilots of the Black Talon squadron will meet you there. Now we'll see how well you work with a team.
Based on info found in the CEF Outpost, it's clear murdering Proust will accomplish nothing as the Earth forces will still invade. Take Proust alive and he can be leveraged to give information about the attacking Earth forces.
Objectives
- Move to Nav 1 and await Proust's arrival
- Wait for the tanks to deploy at Nav 2
- Destroy Proust's escorts
Walkthrough
This is a really short one, and pretty fun at that if you like the combat.
I stuck with same basic setup from last time. I added a hand grenade, but honestly, it's completely unnecessary. Feel free to use a heavier weapon with limited ammo counts. It'll likely only take a few shots to destroy the other gears.
Head to the first Nav, then hide behind a rock if needed. Wait for Proust's escorts to finish their sweep and then Morgan will give you the all clear to attack.
There are three escorts. Take them out, but don't kill Proust. Then the mission ends.
4. Hidden CEF Base
Description
Description
We've picked up a CEF patrol in the vicinity. Find it and follow them. They should lead you back to their base. Don't attack the patrol. Lay low and try to stay out of their sensor range. Once you find the CEF installation, level it.
Background
Background
Thanks to the information we received from the GREL in exchange for Colonel Proust, we've been able to determine an approximate location of the CEF installation. We're setting your team down in an uninhabited area of the Tershaw mountain range. Long range sensors have located a patrol in the area. Find it and track it to the CEF base.
We're reading extremely localized concentrations of radiation, so we're fairly certain the anti-matter device is here. This is the main purpose of your mission here, so make sure you find it and destroy it.
The Earth forces are likely to be using outdated hovertanks and ground based vehicles left over from the War of the Alliance. You'll have the technological edge, but they will certainly outnumber you, so work as a team with your squadmates and use surprise to your advantage.
Debriefing
Debriefing
The CEF was in fact using this outpost as a staging area for terrorist attacks on Terra Novan targets. An intel crew has run the installation's surviving data cores and discovered some vital information. This base was used to receive one-man pods called 'Gate Coffins' from Caprice. Another coffin is scheduled to come through the gate in a few days, so we'll use this opportunity to infiltrate Caprician space.
We'll be providing you a new transport vessel for your expedition to Caprice. The Fury is a state-of-the-art assault transport. It should should serve you well.
We were monitoring the entire operation, and your squad has shown that they are able soldiers. They are also reckless and arrogant, but it seems their arrogance is well earned. Your team is to leave for Caprice immediately.
Proust's GRELs were willing to talk to get him back. There's a secret NEC base in the mountains and it's storing the anti-matter devices. Even the GRELs aren't sure exactly where the base is, so follow a convoy to find it, get in, and destroy the anti-matter weapons.
Objectives
- Locate a CEF patrol and follow it to the base
Walkthrough
On paper, there's a lot to this mission. In actuality, it's not too bad as long as you prepare correctly. You can have up to three squadmates this time. I'd take'em all. Gears on the attack work better as a small team of rabid animals, rather than a lone zebra that'll become the prey — or something like that.
I stuck with the same basic setup as last time — a Heavy AC and a useless hand grenade. Kage, Mailliaux and Vesping came along for the ride, though outside of a little dialog, it probably doesn't matter who you pick. (Though I do like hearing Vesping ask Mailliaux, "Are you always an asshole?")
As instructed, head to the north. Once you hit the water, a cutscene triggers. Stay on passive radar, maybe hit X a couple of times to extend range, then target an enemy vehicle and follow it. You can stay back quite far (300m) and run into zero trouble.
Once they vehicle enters the base, there's another mini-cutscene. Let the vehicles venture to the right, then head left of the gate. You'll encounter a couple of tanks, a few turrets, and several infantry. Take out the tanks, help your squadmates with the turrets, and for the infantry: run over them if they're in your way, otherwise ignore'm.
Can't miss the coms tower, so take it out, then trace back and head to the right (from the entrance) of the gate. In the camp, there are a few small vehicles. Outside of that, destroy everything. If you're like me and going relatively light on ammo, break out your fists and punch those buildings down.
Once, you've dropped enough of them, re-equip your AC and it's time to find the anti matter device. Follow the nav and/or check the map if you must. There may be a stealthy tank along the way, so keep an eye out for it. Knock down this building, then a small convoy tries to escape with another anti-matter device. They're no match for you in the first place, and for some reason, they decide the best path of escape is to run single-file, in a straight line, directly in front of you. Make them regret their stupid decisions and destroy them all. A small cutscene, then the mission ends.
5. Caprician Gate Station
Description
Description
Move to the Gate Station and destroy the communications modules around the communication hub. We need to disable the Gate station quickly so that NEC forces on Caprice won't be alerted to our presence.
Background
Background
We successfully passed through the Tannhauser Gate and are now in Caprician space. Although the squad was briefed on how disturbing the jump would be, it's impossible to be truly prepared for something as extraordinary as dimensional travel. The crew suffered varying degrees of nausea and disorientation, but the effects were short lived, and we're now prepared for the task at hand.
Our intel shows that several turrets guard the station as well as a small garrison of zero-g infantry.We should be able to handle them, but we need to do it quickly. We've set up a dampening field to disable their communications, but maintaining the field will quickly tax the Fury's energy reserves. Once the field goes down and they get out a distress signal, we'll get more trouble than we bargained for.
Debriefing
Debriefing
The Gate station was disabled before a distress signal could be transmitted. We released a number of canisters of TZ gas inside the station as we were leaving. All remaining NEC personnel were neutralized, and we should be able to use the Gate station for our return trip.
We've made a deep-space rendezvous with our Caprician contact, Helene Del Pulciano. She is a ranking member of the Liberati, an insurgent group on Caprice that has been battling the NEC for decades. She has provided us with civilian transport codes to help us clear the Caprician Defense net. We are now heading toward Caprice, where we will attempt to meet with the Liberati rebels. According to Pulciano, they may be able to help us in our mission to gather data and assess the threat the NEC poses.
A movie showing the jump to Caprice starts the level. Inside of Caprician space, there's a ship that would very much love to alert the NEC that outside forces have arrived. Take out the ship's com arrays before that can happen.
Objectives
- Destroy the communications modules before NEC forces can get out a signal
- Eliminate all resistance
Walkthrough
After a quick video cutscene, we're on our way to Caprice.
You'll never guess: I'm using the HAC as my main armament again. I decided to try out an anti-personal grenade launcher since I didn't have a lot of threat value for much bigger and the previously-equipped hand grenade has been pretty much useless. TV is 4500 — you'll need it for the Zero-G systems that you've plucked off earlier.
I actually skipped bringing any squadmates. In my experience, they seem to get aggressive with the ship's turrets early and get into trouble. Rather than babysit them, just go solo.
When the mission starts, there'll be some infantry on "ground" floor. Head to the right, then target the com modules. You should find two to the right fairly quickly. Take them out. From the right, you might be able to catch the two on top as well.
If the infantry shots bother you, head underneath the ship to get to the last two. When you finish with those, two turrets are targeting the Fury. The HAC should have enough range that you can target and borderline snipe them. Once you hit a turret, it'll focus fire on you instead of the Fury, so make sure you take them out quickly after you score a hit.
Lastly, there's a group of infantry targeting the Fury now. Head to the newest nav point and destroy them. APGLs are pretty weird in space. Aiming seems to be different based on whether you're attached to the ground or not. If you are, aim a little low, right in the center of the infantry. One or two hits will likely take them all out since the APGL has some of the best non-mortar splash damage in the game. So, your aim doesn't have to be perfect.
6. Caprice Landing
Description
Description
We need to unpack our equipment and establish a temporary base of operations. Police the area for enemy forces while the engineering 'bots set up camp.
Background
Background
We've successfully touched down on the surface of Caprice. Very few Terra Novans have ever set foot on this planet, but it's not very impressive. The planet has a minimal atmosphere, and there's no sign of any indigenous life forms. All we've seen are sprawling deserts of hard red soil and cold, vicious winds. In spite of its appearance, Caprice is one of the most important planets in the galaxy. It was the first world discovered after humans made their first jump through a Tannhauser gate. It was also the first world mankind colonized outside of Earth's solar system. The only Tannhauser gate near Earth leads to Caprice, so control of the planet is vital to Earth. Without Caprice, the NEC has no access to any of the outlying worlds, including Terra Nova.
Once we set up base camp we'll try to make contact with the Liberati. According to Pulciano, the rebels are active in this area, but they have to keep on the move to avoid NEC patrols, so it might not be easy to find them.
Debriefing
Debriefing
You fought off the NEC attack, but they'll surely send more troops to investigate the disturbance. We can't afford to be here when they do.
We were able to make contact with some of the surviving Liberati forces, and it seems that routing that NEC tank column made a good impression on them. There's a Lieutenant Radec among them who claims that their leader might be willing to help us. We'll break camp and move out with the Liberati. Their base is several days journey from here. Unfortunately, the Fury has barely enough room for our squad, let alone our new Liberati allies. We'll have to travel with the Liberati over land and have the Fury meet us when we arrive at their base.
After discovering the anti-matter base has links to Caprice, it's time to meet up with the Liberati who've been fighting Earth's forces there. Maybe they have more insight into what the NEC is planning.
Objectives
- Secure the area while your engineering Grizzlies set up camp
Walkthrough
Another movie. This time, we see Caprice from space. It's mostly a boring red rock with a city (Gommorrah) running through a crack in the middle.
This time around, you can have up to four in your squad. I'd go for at least three. Personally, I picked Kage, Sobec, and Pulciano.
For my Gear build... you guessed it. HAC and fire control 3.
When you start the mission, command two of your crew to defend the base. The rest can come along with you. I left the hotheads Kage and Sobec at the base (since their trigger-happiness'll be good in this mission) and had Pulciano come along with me.
Put on your wheels, then speed through the first three nav points. Over the coms, you'll hear Earth forces attacking a Liberati scout crew. (Heck, maybe even your crew foreshadows and recommends a few of them stay at your base.) Head over and help out the Liberati. They'll likely be engaging two tanks. Another three will attack after that. Keep moving, focus fire, and you should be alright.
Soon after, you'll hear reports of an attack on your base. Fortunately, your squadmates are there to handle it. Still, speed back and finish the job. It's possible you'll encounter another NEC patrol along the way. You can destroy them or slow down a bit and let them pass. Knock out any remaining tanks to complete the mission.
An interesting note: The repair stations at your base do work should you need to reload!
7. Liberati Base Camp
Description
Description
Return with the Liberati to their base of operations. There you will meet with the Liberati leader, Petrus.
Background
Background
The Liberati should be able to provide us with some valuable information about NEC activities in this region. Their leader, Petrus, has been fighting the NEC since he was a child. The Liberati we are traveling with claim he has knowledge of NEC military installations and weapons development throughout Caprice. This is just the kind of information we came here for. Normally, the Liberati wouldn't divulge this intelligence to anyone, but we may have gained their trust by helping them in battle. We'll see.
Debriefing
Debriefing
The Liberati base was saved, but Petrus is not here. Our mission might depend on the assistance of the Liberati, so we'll continue to work with them for now.
Petrus was apparently captured a few days ago and taken to Bastille Alpha, an NEC prison near the south pole of Caprice. The Liberati seem to believe he won't live long there. They're preparing a massive jailbreak effort, but the prison defenses are apparently pretty formidable. The Liberati have asked for our help, and we would like to talk to Petrus, but suicide missions aren't going to help our cause. We'll proceed to Bastille Alpha in the Fury and assess the situation.
Radec, a member of the Liberati scout crew, knows of Petrus, a commander who's been fighting the NEC his whole life. Escort the Liberati to their base to meet Petrus.
Objectives
- Meet Petrus at the Liberati encampment
Walkthrough
An escort mission, easy enough, right? (Is it just me or do escort missions always suck?) Even better, it's really not an escort mission, phew.
Load up on squadmates. Go for at least three, maybe all four if you can swing it. I'm using the same basic gear build as last time, though in hindsight, I could've dropped the submersible perk and maybe added some reinforcement perks.
Start off by leading the way for your Liberati crew. You may want to sweep the active radar on and off periodically. You'll find a couple of mounts not too far ahead. Take'em out, but you don't have to fly solo when you do. Command your group to attack the same target to quickly destroy the mounts. I like to set <ctrl>+A as the "all attack" shortcut to quickly punch in the command during battle.
After that, there's word that some Liberati scouts have run into the NEC ahead. When you get there, stay on the crest with the scouts, lie down, and let the enemy pass. Keep the last one targeted. Once your stealth guage looks clear, run behind'em and start blasting.
After that, it's back to the Liberati base to meet Petrus. But wait, there's an attack. Be prepared for a firefight. Remember, use your squad to gang up on the enemy tanks. Focus fire with your teammates and you should have this. The tanks here can take a few hits, so they will likely not go down as easily as earlier opponents.
Once you've finished them off, in comes the bad news: Petrus has been captured and is imprisoned at Bastille Alpha.
8. Recon Bastille Alpha
Description
Description
Recon Bastille Alpha. The Liberati have located a hidden observation point near the prison. One of their scouts will lead us there. Avoid drawing the enemy's attention. We want to avoid a full scale battle until we're prepared.
Background
Background
The Fury has set down near the Bastille Alpha. As the Liberati are preparing for their assault, we'll recon the prison and determine the best method of attack.
Bastille Alpha is used primarily for political prisoners, traitors, and prisoners of war, which is how the Liberati are viewed by the NEC. The prison is rumored to be located in the arctic wilderness in order to conceal the atrocities that take place there. Prisoners are reportedly tortured for weeks at a time, until they are broken or die. If we want to talk to Petrus, we'll have to move quickly.
Debriefing
Debriefing
The recon sortie went well. The NEC should be unprepared for our attack.
The defenses at Bastille Alpha are formidable, but it appears the compound will be most vulnerable during the guard change at the main gate. We'll return tomorrow morning with a full complement and attack the prison.
Time to scout out Bastille Alpha and break Petrus and the other imprisoned Liberati free.
Objectives
- Follow the Liberati scout to the observation point
- If you are detected by enemy patrols, eliminate them before they can report your position
- Observe the guards and other prison defenses
Walkthrough
There's a little fighting and a lot of scouting in this one: Crank up your sensors and your stealth this time 'round. Outside of that... HAC VHAC and fire control 3!
Take two squadmates with you. TVs are raised a little here, so take advantage and beef up your companions as well as yourself.
First, you'll need to escort Radec. Four or so tanks will attack along the way. As usual, gang up on them and take'm out. Radec is pretty quick, so the faster you can take down these other tanks, the better.
Once you get close the lookout point, have your squad stay with Radec. There (hopefully) won't be any fighting for the rest of the mission.
Head solo to the lookout point, then creep towards the rocks in front of you. You may have to get a little closer than is comfortable. With your stealth cranked up, you should be able to stand and still avoid detection. Possibly, a VTOL flies by that would require you to crouch, but if you're stealth is high, you're probably fine.
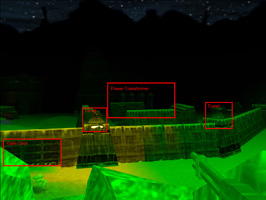
The bigger issue here will be that the game's clipping distance is set to around 300m, so turn on imaging (default "I") to help see. Flash your active radar on and work through the targets. This'll get you started. For a few items, you'll probably have to target them directly using "Target under Reticle" ("R" key by default).
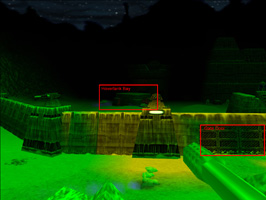
These are the four items that need to be targeted:
- Turret
- Hovertank Bay
- Gate
- Power Transformer
After that, you need to observe the guard pattern, AKA sit there until the gates open. With this knowledge, the attack will begin tomorrow (AKA next mission).
9. Assault Bastille Alpha
Description
Description
Once inside the prison, knock out the power transformers and the hovertank bay. When you've eliminated all the NEC units inside the prison, the Liberati will bring in a transport vehicle to remove Petrus.
Background
Background
We're ready to assault the prison. We've got two striders ready to blow the gates with artillery when you're in position. The prison wall is lined with laser turrets, and they're too heavily armored for us to bring them down. Hit the power transformers toward the back of the prison compound. This should disable the turrets. You'll want to take out the hovertank bay too. That should stop them from deploying more units from the prison. We're going to have our hands full as it is.
Once the Liberati move in, you'll have to protect them until we can get back to the Fury. Their light assault vehicles will be so much fodder in the kind of firefight we're headed into. There may be other NEC forces in the area, so the longer this takes, the more resistance we're likely to get.
Debriefing
Debriefing
We've liberated Petrus. He's suspicious of our motives, but he seems to be grateful for our intervention.
The Liberati know a lot about NEC activities on Caprice, and they've agreed to work with us. Petrus knows of several NEC installations where we could gather intelligence. They're well guarded, and the Liberati don't have the firepower to tackle them alone. That's where we come in.
Carlie Pinter, one of the prisoners we freed from Bastille Alpha, has offered to join us. Some members of the team don't like the idea of working with an Earther, but we can't afford to turn away qualified pilots.
Now that you've scouted Bastille Alpha, it's time to break in, rescue Petrus and other the prisoners, then make it back to the Fury.
Objectives
- Bring down the turret defenses
- Eliminate all enemy forces inside the prison compound
- Protect the transport while the Liberati are infiltrating the prison
- Escort the transport back to the Fury
Walkthrough
After doing a lot of experimenting here... I decided to stick mostly with the classics. Fire Control 3 with the addition of a Very Heavy Autocannon makes for a good killer. Note my Manip Arms are cranked to 10. Jump jets, ECM, etc. are probably not worth it. Take Sobec and Wallis since they pilot the Cobra and Kodiak support gears, respectively. Threat values are high for everyone, so be sure to upgrade your squadmates, too.
The battle begins pretty much instantly. Very likely, some fire from the base turrets will be coming your way, as well as two mounts. The VHAC should make short work of the mounts and your squadmates will probably do well handling the turrets. Of course, you can potshot the turrets, too. It might help to head towards the right. I think this could block some turret fire. Maybe.
As they continue with the turrets, head through the front doors and directly into the base. Switch over to your fists and punch out power transformers. Your fists will take them down quickly and save some ammo for later. While your there, finish off the hovertank bay, too. Most likely, there'll be a tank nearby it. Shoot it or fist it — the choice is yours.
If needed, finish off anything left, then the rescue crew will enter the base. After a brief cutscene, two striders will show up just beyond the entrance gate. Play the game and hug just around a corner, blasting them before they can notice you're ther.e Repeat on the other side.
Morgan will chime in stating more forces are on their way. Personally, I had to hunt them down every time I went through this mission. Head out of the gates and start venturing left. Maybe even toggle on the active radar. You should find a tank about 300-400m out. Kill it, then repeat on the right side of the base, too.
Another scene: This time, we find Petrus... and a bunch of dirty Earthers. Time to head back to the Fury.
About 500-600m out, you'll run across several tanks. Finish them off and the mission ends.
10. Mount Boniface
Description
Description
Search the craters for the NEC staging area. When you're in position, Petrus will signal the attack. The area is teeming with patrols. Try to avoid them if you can.
Background
Background
In the northern volcanic regions of Caprice lies the Nabakov Range, a massive expanse of dormant volcanoes. Near one of these, Mt. Boniface, lies an NEC military staging area. Petrus claims that a General Trilkin is inspecting the base. Trilkin is the field commander for all NEC forces on Caprice, and he is is in the process of conducting planetwide inspections of all NEC military facilities. He is carrying with him a data core which contains detailed intelligence on all NEC facilities and troops throughout Caprice. We have to get that data core.
We'll raid the compound with the assistance of the Liberati. Your squad will make a diversionary assault while the Liberati sneak in and acquire the data core. We've landed near the installation, but Petrus claims not to know the exact location of the staging area. We do know that it is rumored to be located inside a large crater.
Debriefing
Debriefing
Our attack on the NEC staging area was a moderate success, but General Trilkin escaped with the data core.
With the help of the Liberati, we breached the heavily guarded facility and managed to wreak a little havoc. NEC casualties were significant, and it should be some time before they can get the installation up and running again. However, General Trilkin eluded us. He took the data core and fled the base with a small escort. The intel in that core is vital to our mission, so we'll have to pursue General Trilkin. We're running long range scans with the Fury, and we'll re-engage as soon as we pick something up.
Petrus knows the general area of an NEC encampment that would be an ideal target for intel gathering, as base inspector General Trilkin of the NEC tends to keep a data core with all base information on person. Unfortunately, Petrus doesn't know the specifics, so you'll need to scout several spots and find the encampment.
Objectives
- Locate the NEC staging area
- Attack the installation when you get the signal from Petrus
Walkthrough
Full disclosure: This mission is super-bugged for me while playing in Windows 10. There's a background ambient audio loop that plays constantly over top of everything else. I'm missing most of the mission dialog. To boot, I think some of the scripted sequences aren't triggering correctly. This makes the mission a little frustrating and if you want to type "set mission" into the console and call it a day, I don't blame you.
Load up with some lasers and up your stealth capabilities. I opted to drop Fire Control down to 2 so that I could pack a Heavy Laser and a Medium Bazooka. Load up on gear pilots. Notice my TV is 4399, which is exactly enough to squeeze in a fourth squadmate. I took Sobec, Wallis, Pinter, and Maillaiux with me, all in their standard variants.
Part 1: Find the base.
Long story short: It's at Nav 5.
So, two options: 1. You can go through all of the nav points. 2. Or, you can go directly to Nav 5. If you go directly to Nav 5, you'll find a "road" made of hardened lava that you can follow. Either way, the strategy is the same: Extend your radar range (default "Z"), then constantly switch to active radar. If something is far enough away, crouch down and let it pass. If it gets too close, blow the shit out of it. I'm using the bazooka for this part.
Once you get about 400ish meters outside of Nav 5, you should pick up some turrets on your radar. Tell your squad to stay in place behind you. If you don't, then they've got a habit of suiciding directly into the turrets. After that, switch over to your laser. You should be able to target and zoom in on the turrets. Even if you can't see them (damn, this fogging distance is short), you can still destroy the turrets. Though the listed ranger of lasers is 300m, I'm pretty sure they actually goes farther than that.
After two turrets go down, there'll be a cutscene where Trilkin escapes in an APC.
Part 2: Catch the APC.
If you want to play it straight, pick off the remaining turrets around the base from a distance. If you don't, your squad is going to have a bad time. Head
As an alternative route, you can go to the left of the base without entering it. You'll probably still need to take out any front-facing base turrets, though.
After that, follow the hardened lava "road" until you reach the roadblock. This feels very similar to the beginning of the mission, but at this point, just gang up on any NEC forces in the way and destroy'em.
Once you make it to the roadblock, it's too late. The Trilkin and the APC have gotten way. Despite heavy Liberati losses, Petrus has managed to escape. Now, it's time to track down that APC.
11. Capture NEC Officer
Description
Description
Liberati scouts have discovered an NEC army encampment southwest of your location. General Trilkin's APC seems to be heading toward this army. If he makes it there, it's going to be tough to get the data core. Stop the APC before it reaches the army encampment.
Background
Background
We got a little more than we bargained for in the attack on the Mt. Boniface installation. While we were able to penetrate the installation, General Trilkin and a small contingent of NEC forces escaped with the data core. To make matters worse, a large number of Petrus' forces were killed. It seems that Petrus' estimates of NEC troop strength are questionable, at best. It's unclear if the rebel leader is courageous or just suicidal.
We've managed to locate Trilkin's APC, but it's on course to rendezvous with what looks like an entire column of NEC hovertanks and assault mounts. Petrus tells us force concentrations of this magnitude are extremely rare. This is a larger attack force than we could hope to take on, so we need to stop Trilkin before he gets to the army encampment.
Debriefing
Debriefing
Good work, commander. We obtained the data core and, as a bonus, eliminated General Trilkin.
OR
Trilkin escaped us again and made it to the NEC army encampment. We'll have to infiltrate the encampment, but we'll regroup at the Fury and rearm first.
We've made a preliminary run at decoding the information from the data core with the Fury's onboard systems, and it looks like we've got the locations of most of the NEC military sites on Caprice. There's also some heavily encrypted information about an 'Operation Brimstone'. We'll let the decryption algorithms chew on the encoding format, but it may take the big machines back on Terra Nova to crack it. In the meantime, we've turned up the location of a covert research installation nearby. We'll head there in the Fury. We've also sent a coded fatline message back to our superiors on Terra Nova to keep them updated. They should be pleased with our progress.
Trilkin, the APC, and the data core have been found. Disable (not destroy) the APC and get that data core!
Objectives
- Locate and disable the escaping APC
Walkthrough
As usual, setup is vital for this mission. This time I'm using the snub cannon, as it hits about as hard as anything in this game (though it's limited to an 80mm range). A medium 'zooka is the backup. My SMS speed is maxed and I've got ECM (though I could only manage level 2 on it). I went solo.
The plan: Hit hard, get in, get out.
Enable your wheels and had to the first nav for a quick cutscene. Memorize the APC. Target it. Wait.
If they APC breaks left, you're lucky. Wait a bit for a few of the mounts/tanks to pass, then hit the ECM and sprint towards the APC. (I usually charge before I've been given the okay.) You may end up sprinting past some mounts. One hit from the snub cannon should disable APC. Run like hell if needed, then pick off the APC guards one by one. Mission successful.
If the APC breaks right, this is harder. There'll be too many other enemies in front of it. So, head to the Encampment Nav. Wait outside of it until the APC is in range. One hit from the snub cannon should disable it. Run like hell, then pick off the guards one by one. Mission successful.
If the APC makes it to the camp, the mission continues. Here, you'll need to scout out the encampment. You'll get a nav point to the overlook, but to be fair, it can be a little tricky to find it. The tactical map might help, but in my experience, you probably can't really zoom out enough to find things. If you get nearby, look for ridge to the right of the camp. This'll lead you to the lookout. If you happen to find the ridge, maybe set up some Nav points in the map to help guide you there.
The mission ends when you reach the checkpoint. You'll have to wait until night falls to get that data core.
12. Assault NEC Mobile Camp
Description
Description
You need to find a way into the encampment and locate the headquarters building. General Trilkin and the data core are there. Move slowly, use your passive sensors, and keep an eye on your stealth meter. This is a fight you can't win, so avoid enemy contact.
Background
Background
We need to get to Trilkin and get that data core. We'll have to infiltrate the NEC encampment. The camp is crawling with NEC forces, so if they detect you, we're all finished. The more units we send in, the less likely we'll get through unnoticed, so you'll have to do this on your own. It's a suicide mission, but that's what they sent us here for. Penetrate the camp undetected and find the field headquarters building. Once you have the data core, return to the Fury immediately. The rest of the squad will rendezvous with you there.
Debriefing
Debriefing
Good work, Commander. We obtained the data core and eliminated General Trilkin.
OR
So much for the sneaky approach. I guess killing everyone in sight was an option we hadn't considered. Trilkin's dead, along with everyone else. We made our way through the piles of wrecked Mounts and hovertanks and acquired the data core.
We've made a preliminary run at decoding the information from the data core with the Fury's onboard systems, and it looks like we've got the locations of most of the NEC military sites on Caprice. There's also some heavily encrypted information about an 'Operation Brimstone'. We'll let the decoding algorithms chew on the encryption format, but it may take the big machines back on Terra Nova to crack it. In the meantime, we've turned up the location of a covert research installation nearby. We'll head there in the Fury. We've also sent a coded fatline message back to our superiors on Terra Nova to keep them updated. They should be pleased with our progress.
We need that data core. Sneak into the NEC encampment, find Trilkin, steal the core, and get out undetected.
Objectives
- Enter the army encampment undetected
- Find the headquarters and acquire the data
Walkthrough
An optional mission? This is the only branching pathway in the game. If you didn't disable the APC in mission 11, you'll have to assasinate Trilkin and steal the data core here.
As always, setup is critical. If you play your cards right, you may not even need to fire a shot. That being said, I wouldn't go without any weapons. Make enough space to incorporate some jumpjets this time around. I've got the classics — Fire Control 3, Very Heavy Autocannon — along with maxed ECM and maxed jump jets.
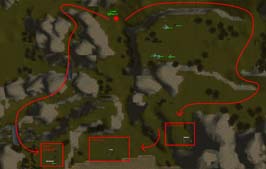
About 400m out from the camp, you'll pick up some patrol tanks on the radar. Hang a right. If you start to take the next entrance towards the camp, you'll encounter another patrol. The goal is to get back to the camp in the same manner as the last mission. There are two main ways to do this: Either loop around until you get there, or use your jumpjets to take a shortcut through. Check the map to the side for details. Use your tactical map and set up nav points if needed to help get you there.
Once you make it to the overlook, there's a spot between a recess and a ridge where your gear will fit perfectly. From here, peer over the edge of the ridge and observer. There's a sentry that is patrolling. Wait for it to turn around — if it gets line-of-sight on you, the alarms will sound.
When you're ready, head over the ridge and aim to the right of the nav. I usually jump between the two mounts and over the APC (no jets required for that one). You'll get a cutscene (and see yourself!), then it's time to escape.
For the escape, hit your ECM, then race towards the ridge. Just beyond it, there's a side with a gentler slope guarded by two mounts. Use your jumpjets to leap up/over the ridge and get out. With any luck, you won't be spotted at all. If you are, the ECM and jets should give you enough of a head start that you'll be okay. Refer to the second map for the recommended entrance and escape pathway.
Race to the fury. When you get there, you'll need to battle a few mounts. Fortunately, your squad is there to help, so these mounts should be easy prey.
Alternative approach: If you're Billy Badass, just kill everyone.
13. Track NEC Patrol
Description
Description
Find the NEC encampment and locate the APCs. Target them so we can lock them into the Fury's tracking systems. Then attack the camp. Approach the camp cautiously. It will be easier to get the APCs targeted if they don't know we're here.
Background
Background
The intelligence we decrypted from the data core tells of an NEC weapons development facility somewhere in the volcanic wastelands around Mount Giovanni. Apparently the Mt. Giovanni installation is the primary Caprician facility for advanced weapons research. This site should give us a good idea what the NEC is up to.
Our intel doesn't provide the exact location of the research facility, but the Liberati have observed long range patrols in this region on a regular basis. We've located one of these patrols bivouacked for the night. There are several unarmed APC's in the encampment. If you can target the vehicles, we can lock them into the Fury's long-range tracking system. Then attack the camp. Eliminate all combat forces, but allow the support vehicles to escape. Once they have returned to the research facility, we can track them in the Fury and pinpoint the installation's coordinates.
Debriefing
Debriefing
The NEC forces have abandoned their position, and we are currently plotting the route of the patrol vehicles. We should know the location of the weapons facility shortly.
Our tracking system has a functional range of over 200 kilometers. It's unlikely that the NEC would employ patrol radii larger than this, but due to our lack of familiarity with the enemy's combat tactics, we should make no assumptions. We'll follow the fleeing patrol in the Fury.
These new NEC units we encountered are a grave concern. Petrus calls them 'Frames'. They're similar in construction to Gears, but appear to be more advanced in some ways. Our primary advantage over Earth forces in ground combat has been the mobility of our Gears. It looks as if we may have lost that edge. We need to find out more about these Frames.
Thanks to the data core, we know there's a weapons development facility somewhere nearby. To find the exact location, attack an encampment and let its feeling APCs lead us to the weapons base.
Objectives
- Target the APCs
- Attack the camp
Walkthrough
Here's a simple one.
I've got the typical loadout. In fact, I'm using the same 4.5k TV with a Very Heavy Autocannon from Mission 9. No mates for me.
Head to Nav 1. When you get there, Morgan will give you a choice as to which approach to take. Head west and to the cliff. You'll probably already pick up most of the camp on your radar. That being said, lie your gear down and creep towards the edge of the cliff. Find the APCs (fortunately they're very bright compared to the... red rocks of Caprice) and use target under reticle (default "R") to target them.
After that, you can attack the camp. It's really up to you from here. I decided to snipe. Target a mystery unit (frame), get a good lock... and let the bullets rain. The frames'll send some fire your way, so you may need to shimmy back behind the cliff for a bit. Unfortunately, if a target is too low, it's hard to hit. Personally, I jumped over the cliff to finish off the last frame. Once you've destroyed all three, the mission ends.
14. Assault Mount Boniface
Description
Description
Find the power station and eliminate any units defending it. Control the area while the Liberati engineers work on bringing the power down. The main compound is full of turrets, so avoid the area until the power station is disabled.
Background
Background
We've tracked the NEC patrol to a weapons research facility in the crater of an active volcano. The Liberati have reconnoitered the site, and the outlook is not promising. The installation is heavily defended with turrets and laser fences. The entire site is apparently powered by a geo-thermal power station, which is drawing lava from the crater. Lieutenant Radec claims that he and his engineers can move in and shut down the station if we can seize the area and hold it. Once the power to their fixed defenses is cut, we can move in and destroy the installation.
Debriefing
Debriefing
The research complex was completely devastated.
It appears this installation was developing various Frame weapons as well as some unknown composite that they're using for Frame armor, but this isn't where they're producing the Frames themselves. We've made another breakthrough in decoding the data core, and it looks like the Frames are being made in the city of Gommorrah. Walking into the largest city on Caprice wasn't what we had in mind when we came here, but Petrus has some ideas about how we might be able pull it off.
Two Liberati pilots, Tharne Nulf and Robie Bray, have volunteered to join us. Feel free to use them at your discretion. They're capable soldiers. Petrus says they're his best. They obviously don't have much experience with Gears, but they can learn.
The APCs have led us to a weapons facility. Defend Radec while he takes down their geothermal power. Once their power is out, attack and destroy the base.
Objectives
- Capture the geo-thermal power station
- Defend the Liberati engineers while they take the power station off-line
- Destroy the research facility
- Eliminate all defenders
Walkthrough
If you like combat, this is a fun one. Bring the usual setup — Fire Control 3 with a Very Heavy Autocannon. Grab a couple of squadmates. If you've got TV for it, use some of the higher TV variations for them.
When the mission starts, briefly toggle on your active radar. You'll probably get a hit for a hovertank right off the bat. Have you and your squad attack it. From there, three mounts will join the fight. Same approach: group up on'em and take'm out.
After a brief cutscene, Radec heads in to shut down power to the base. Stay near the north side and a tank'll attack. After that, one attacks from the other side, too. Be careful around the lava — it's mighty rough on your gear.
After that, the power is down and it's time to raid the base.
There are five frames inside of here. In my opinion, frames are way easier to fight than tanks. But, be careful as you go around corners and gates. You don't want to end up on the wrong side of a 2 vs 1. The turrets in the base are offline, so disregard those. Outside of that, stick with the usual strategies: Target an opponent, hit <ctrl>+a to sic your team on them, then make it a 3 vs 1 in your favor.
15. Tunnels to Gommorrah
Description
Description
You'll have to do this alone. There is reportedly an elevator in these mining caverns that will take you up into the city of Gommorrah. Find it. You should stick to your hand to hand weapons to avoid drawing enemy attention.
Background
Background
We've had another breakthrough in decoding the NEC data core. The primary site for development of NEC martial technology is in an area called the Paladin Lots in the city of Gommorrah. This is apparently where they are producing their version of the Heavy Gear, the Battle Frame. We must find a way into the Paladin Lots in order to gather as much information about these Frames as possible. We figure a solo mission is the best chance we've got of penetrating Gommorrah, so you'll be on your own until you get out of the city.
Petrus has informed us of a network of mining tunnels that run under the city of Gommorrah. The Liberati believe the area has not been actively mined for some time, but they cannot confirm this information. Somewhere in the tunnels is a freight elevator. Once you find it, a Liberati Mole inside Gommorrah will activate the lift and get you into the city.
Avoid using live weapons fire in the tunnels. If we draw attention to ourselves, we'll have no escape route. Use hand to hand weapons if you encounter any hostile units.
Debriefing
Debriefing
You found the lift that will take you into the heart of Gommorrah. What lies ahead may be the most difficult task you have ever faced.
OR
Although the sentries were alerted to your pressence, you were able to achieve your goal through sheer skill and tenacity.
It looks like Petrus has prepared some help for you in Gommorrah. A Liberati mole known as the Dragon has hacked into the NEC's security net. He'll guide you through Gommorrah and hopefully lead you to the Paladin Lots. He's the best chance you've got.
Petrus' mole, Dragon, has given you access to the city. He's been given orders to help you through the NEC's security net in Paladin Lots. Listen to what he tells you. He's the best chance you've got.
As it turns out, the frames weren't being built at the last base — only weapons. Instead, it looks the frames are being constructed in Gommorrah. It's too obvious to just march right into the biggest city on Caprice, so the plan is to get there via underground mining tunnels. Find the way through.
Objectives
- Move through the tunnels and find the elevator that leads to Gommorrah
Walkthrough
Full disclosure: This mission is pretty bugged for me playing in Windows 10. I'm pretty sure I'm missing several audio messages. Several times, the game would crash once I made it to the elevator and began shooting the guards. When I finally made it through without a crash, one of the guard mounts clipped itself through a wall and was basically off-map. Fortunately, I was able to shoot one of its legs sticking out and destroy it that way to end the mission. So, there's not shame in opening the console, typing "set mission," and going about your business if this one bugs out on you, too.
Despite the imperative to not shoot anything, ignore it. Don't be like me and skip weapons the first time through. You'll definitely want them at the end (and if something goes wrong). With a higher TV, I decided to keep the same basic build, but up the stealth to 5 and ECM to 6.
This can be a long mission if you take it slow and stealthy. My advice? Don't be scared, homie: Take it fast and stealthy.
Part 1: The Caves
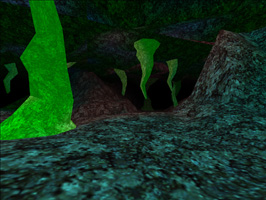
For the first part of the mission, punch through a rock brigade, then head towards the NEC mining caverns. A few notes: You may want to turn on image enhancement ("I") to help see. If you notice stalactites and stalagmites, there is likely a jump ahead. Because of the jumps, I prefer to walk rather than use SMS. There are three jumps total, so once you pass the third, break out your wheels. You don't need jets to make the jumps, but you can pack them if it makes you feel more comfortable. Head towards the nav point. There are no enemies yet, so keep your active radar on as it'll help show the terrain in the map.
Part 2: The Mines
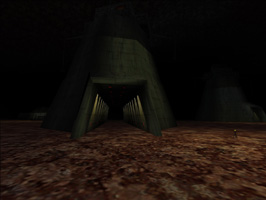
Once you're in the mining area, play a stealth game. The gigantic mounts are borderline blind until you get in their face, but don't let them step on you. If you do, you'll hear a couple of pings, then your gear goes "pop!" There are some frames, but generally avoid them. For the most part, head towards the nav and if there's an enemy in the way, backtrack a bit, get some space, hit the ECM, and zip past. I like to keep the active radar on when I can here, too, as it'll make it easier to navigate the maze. It's also a good idea to extend the radar range ("X"). Throw on your wheels, ECM when needed, and basically race to the nav. I'd say it should take about 6 minutes from the start of the level (including part 1) to get to the elevator.
Once you find the elevator, you'll need to destroy the guards. That would be the big-ass mounts hanging out in front of it. Forget your hands and break out the guns. Likely, you can get some shots in on them before they realize what's happening. This area has been very buggy for me, but if you manage to destroy nearby mounts (including one that may clip through the walls), the mission will end with a cutscene of your gear approaching the elevator to the Paladin Lots.
16. Paladin Lots
Description
Description
Penetrate the NEC defenses and get inside the Paladin Lots. Dragon, the Liberati mole, has hacked into the NEC security net and will guide you through the city. Listen to him if you want to make it out alive.
Background
Background
Gommorrah is the social, industrial, and military heart of Caprice. Without this city, the entire planet would cease functioning. More than half of the population of Caprice lives in the city of Gommorrah. You'll be entering the military sector of the city, so resistance will be heavy.
While Gommorrah is an incredibly dense city, certain areas have been designated off-limits for construction. Paladin Lots is one such place. The Frame facility you're looking for lies in the interior of a huge mesa. You are to locate this mesa and enter the facility. Once inside, get to the mainframe at the bottom of the facility. Dragon will break into the mainframe and download the data we need. When you're finished, there's a cargo train nearby that will take you out of the city.
Debriefing
Debriefing
The Frame data you obtained should prove invaluable as Terra Nova prepares for a full-scale conflict with the NEC. However, your most immediate concern is how to get back to the Fury and get off of Caprice in one piece. Our campaign will be a success only if we can get the intelligence we've gathered back to Terra Nova.
Welcome to Gommorroah, asscrack of the universe. Infiltrate the Paladin Lots where the NEC is manufacturing frames. Get in, get intel on the frames, then get out via cargo train.
Objectives
- Work your way to the Paladin Lots complex
- Download all data from the mainframe
- Escape Gommorrah
Walkthrough
Full disclosure: Another buggy mission. Sometimes the voices come through on the audio, sometimes they don't. Press "O" to bring up the objectives if needed.
This is long mission. There's a lot of sniping, so bring a laser-based weapon. I went for the HGLC — I can still manage to keep Fire Control at 3 and keep plenty of ammo. (You'll need it!) Outside of that, it's pretty much the same build from the last mission. If you want to risk it, you could bring something else. Many frames in the level will drop HGLCs, but what weapon you get is a bit of crap shoot. Whenever you run across a dropped weapon, though, pick it up! There's a decent chance you'll need the extra ammo.
Right off the bat, there'll be a frame. They don't seem toe expect you. Remind'em you're there and and blast'em.
Keep your radar on active where you can. There are a lot of Kestrels (aircraft) flying around in this mission. If possible, zoom in and laser them from a distance before they get in range. You'll encounter one or two shortly. As you approach the Fushima building nav, there's another frame. You can toggle on ECM as you fight to help avoid detection. Pick up any weapons from the frames. The extra ammo may very well come in handy later.
Hop off of the elevator and again you'll battle another frame. More Kestrels litter the sky, so take'em out before they get close. Another frame awaits as you approach the Hashima nav.
Ride the elevator and hop off quickly. Don't stay on the elevators too long or they may take you back down. This time, there are turrets on the bridge as you head towards the Anderson compound. The best bet is to game them. Peak over the the edge just enough to see the turret, then shoot. It's cheesy, yeah, but it works.
More turrets in front of the Anderson elevator. Likely, you can catch them off guard from a distance. Destroy the two facing you; you can leave the third.
Hopping off the Anderson elevator, two more Kestrel's fly by. Blow'em out of the sky.
On the way to the Kishin tower elevator, there's another frame. You can probably snipe it from a distance.
At the bottom of the Kishin elevator, there's another frame waiting for you. (picture)
As you head to the Mesa, there's another Kestrel and two turrets. Game the turrets again (picture).
And now, for the worst part of the level, and possibly the entire game: The ramp. There are turrets and frames down below, but due to the clipping distance, you can't see them. If you go straight down the ramp, the turret is likely to blast the shit out of your gear before you can even see the damn thing. So, unless you know a way to fix the clipping fogging distance (please contact me if you do!), we'll cheese it some more.
Head to the ramp. With sensors set to 5, you should able to target the frames and turrets below. (in this picture, I'm aiming sideways because it shows the target brackets, but not when I'm straightforward.) Though you can't see frames and turrets, your laser weapons have the range to hit them. Shoot them.
There's also a turret to the right of the ramp and possibly another two Kestrels flying around.
When you finish it all off, sit on the Mesa nav and wait. The elevator will take you down. Very important: Head to the west. (picture) If you go the wrong way (east), you'll have no chance of defeating the turrets that lie ahead.
These turrets are viscous. Because of the shaft's curvature, you can't outrange them. They have unlimited ammo to boot, as far as I can tell. So, you'll have to cheese your way through them. (picture) Lie your gear prone, hit the ECM, then slowly edge pass the side wall until you just barely see the turret. Blast that laser until the turret blows. There's a second one on the way down, too. Same strategy. At least it's on the right side of a wall, so it's a little easier to hit.
Make it to the elevator and head down. Some NEC frame pilot talks a buncha shit (Ooh... scary, Mr. "I've tested every frame ever" and "I even get the them song to play when you fight me"), but will go down surprisingly easy once you make it to the basement labs. Make the guy eat his words by lasering him from a distance, then head over to the Mainframe Nav at the lab computers to send the frame data back to Dragon. Follow another nav to take the elevator back up. Be careful: There's a turret immediately at the top of the elevator. Hit your ECM before you arrive at the top and shoot that sucker down ASAP!
Next, somewhat retrace your steps. You'll be spiraling upwards with more annoying turrets. Repeat the strategy from earlier: Once you're almost around the corner, lie down, hit the ECM, edge over just enough spot the turrets, then laser them away.
After that, yet another elevator, but it this time it leads back up above ground. Time to get out. There could be one last turret, but you've likely shot it down approaching the ramp of death from earlier. Head to the last nav and now it's time to hitch a ride out of the city. Phew.
17. Hydroponics Farm
Description
Description
Find a way out of the domes and rendezvous with the Fury
Background
Background
The monorail you boarded to flee Gommorrah has taken you into a network of Agricultural Domes. Caprice's soil is extremely barren, and most of the planet's food supply is grown in massive hydroponic greenhouses like this one.
The NEC is obviously on to us, and they know where the train was heading, so they'll be here soon. If they're not already...
Debriefing
Debriefing
While you were in the Hydroponic Dome complex, NEC forces swarmed the Fury. With the help of the Liberati we managed to escape with most of our equipment intact, but the Fury was destroyed. Most of the squad survived as well, but we now have no way to get off of Caprice. Vega Spaceport is nearby. It's the largest port on Caprice, so we can try to hijack a ride from there. The Liberati will lead us there.
We're guessing the NEC was trying to retrieve the data core. Luckily the Liberati warned us a few minutes before they arrived, and we were able to evacuate it before the attack began.
Out of the Paladin Lots via cargo train, the arrival destination is a botanic garden to grow food supplies for red rock that is Caprice. Get to the Fury and get out.
Objectives
- Find an exit from the domes
Walkthrough
To counterbalance the last mission, here's a relatively (what wouldn't be?) quick one.
For the set up, I'm back to a VHAC with Fire Control 3. There was some breathing room TV-wise, so I've upped the Stealth to 7 and Movement to 2. Speed will be your salvation in this mission, so you don't want to lose your movement systems via critical hit. Tack on a rugged movement perk for safe measure.
I think the best idea here is to use your speed to your advantage. Sure, you could take it slow and try to sneak around, but I think that puts you at too much risk — if you get detected, frames'll be all over you.
Instead, engage your wheels, and speed through. My best route: Middle, second from right, leftish. If you're spotted along the way, ignore it and keep moving. Realistically, I don't think it actually matters what path you take.
You'll know when you hit the last dome as three frames com over the coms and announced they've blocked the exit. Sure enough, if you try to go to the exit, they've stacked crates in front of it. It seems like these frames pack quite the punch, so if you take a hit, it's likely to be critical. Personally, it seems my movement systems get hit a lot, but we're prepared! That being said, it shouldn't be too much work to destroy the frames. You can probably sneak in a few shots on them before they realize what's up. If not, use the trees, crates, and immobile vehicles as cover if needed, then strafe in and out. Finish them off and the mission is basically over.
Last step: Speed over to the not-too-far-away final nav. The mission ends with a cutscene where we discover that the Fury has been destroyed!
18. Enter Vega Spaceport
Description
Description
Search the area. Try to locate an entrance to the spaceport that won't draw attention. Avoid enemy contact if you can, but you'll have to eliminate any units you encounter.
Background
Background
Now that we've lost the Fury, we'll have to find another way to get off of Caprice. Vega Spaceport seems like our best bet, but it offers some pretty long odds. The NEC controls the port, so it's sure to be crawling with hostile units. They'll probably expect us to head for the spaceport after we evaded them at the farming domes, so they'll be on full alert. We should try to find a low profile way in, if possible.
Debriefing
Debriefing
You managed to enter the spaceport without raising too much of a ruckus. The NEC doesn't seem to know we're here, yet. They will soon. The airfields are near the military sector. That's our best bet. We'll head there and see if we can liberate a ship to get us off this rock.
With the Fury gone, it's time to find a new ride at the Vega Spaceport. It's heavily guarded, so the only option is to sneak in undetected.
Objectives
- Find a way into Vega Spaceport
Walkthrough
For some reason, your squadmates are suicidal maniacs in this level, running gung-ho into laser turrets when it's time to scout. As weird as it seems, I think you can probably hack it alone and maybe even be better off for it. Of course, if you don't really care if they live or die, bring as many as you can with you and pray that they leave the laser turrets alone. Alternatively, you can micro-manage them to death and try to beat some sense into their brains.
The build is pretty much the same as the last round (VHAC, Fire Control 3), but with a few concessions due to the lower threat value. Against my better judgment, I brought Mailliaux, Sobec, and Pinter with me.
At the start of the mission, immediately head left (if you don't want to jump over the cliff edge) and take the ramp down. Stick with the standard radar tricks — increase your range ("X") and occasionally swap to active mode to pick up enemies earlier. With many ships going in and out of the spaceport, not every red dot on the radar will be a target.
Head towards the space port nav, but veer to the right side of the map. About 1300m out from it, you'll be alerted to some activity ahead. Swing to the right, through the natural arc. There's a small outpost with three gears and two turrets. Likely, the safest best is to snipe from a distance. You should be able to hit the turrets before they detect you; the frames won't last long against your VHAC.
It's possible that a straggling frame or two will try to shoot at you from the top of the mountainside. Remind them why that's a horrible move on their part.
Now the fun: To try to prevent your squad from channeling their inner Don Quixote, tell them to cool their jets by bringing up the command menu (default "C") and punching in 1, 6, 1, 3 so that will they will (hopefully) hold their fire.
Head towards the spaceport nav and a cutscene will trigger about 120m out. The gate to the space port is heavily guarded and only opens for cargo ships. There's no way a direct attack will work. Now, as soon as the squad echos that sentiment, in my game, they immediately start attacking the laser turrets and proceed to get absolutely slaughtered.
To prevent that, swing to right of the spaceport and start to trek towards Nav 1 as fast as possible. Immediately bring up the tactical map and tell your squad to move to a spot near you. If they don't move, tell'em again. And again. And again. Eventually, they'll catch up with you, hopefully with enough armor to be of some use later. At this point, you can tell them to engage at will again.
There's a high ground path that you can take that'll keep you out of sight as you travel to Nav 1. Take it while you can. It's possible that you run into a straggling frame here or there. Don't let those frames survive.
Nav 1 is a dud, so head to Nav 2. Four frames await there. Snipe a bit from range, then head in and finish them off. If your crew has managed to make it this far, it should be an easy fight.
Once you hit Nav 2, it's mission success. Fortunately, jumping into a cargo truck is part of the cutscene and you don't have to do that yourself.
19. Locate Spaceship
Description
Description
Make your way to the airfields and try to find a vessel capable of transporting the entire squad.
Background
Background
We've made it inside Vega Spaceport. Vega is enormous. The commercial sectors alone are bigger than any port on Terra Nova. We'll have to head to the military zone to find a ship that can carry Gears.
Debriefing
Debriefing
We've obtained valuable intelligence on NEC troop strength and deployment, locations of their military bases, and the state of their technology. We also managed to cripple several of their sites and, most surprisingly, we got off the planet alive.
Unfortunately, the ship we commandeered isn't Gate worthy, so we still have no way to get back to Terra Nova. We'll proceed toward the asteroid mining fields. There's a star port there where we should be able to find a Gate-capable ship.
You're made it into the Vega Spaceport. Time to find a ship and get off of Caprice.
Objectives
- Locate a suitable ship
Walkthrough
I'm using the HGLC setup again. Depending on how you attack the level, there are potentially lots of things to shoot and only so much ammo on the VHAC. Sensors, movement, etc. are cranked because I can with 6k TV. Super important: Add jumpjets. Even at level 1, you'll be able to hop over walls/gates/fences and make this mission way easier.
I brought the same crew from last time — Mailliaux, Sobec, and Pinter — though they not even be needed. With the max team TV being 15000, I kept the 6k for me and put them in their default gear configurations. Real main character energy.
Two approaches: To jumpjet or not to jumpjet.
Jumpjets - The Easy Method
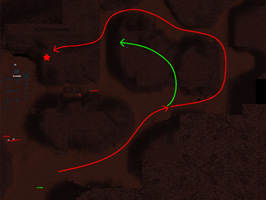
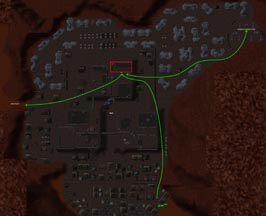
Look at the map I've drawn up and follow the green arrow from the start spot to the ship's location. Hop a fence, put on your wheels, then head to the ramp that leads to the ship at the airfield. If you encounter a frame or mount, kill it if you want. Or, just ignore it.
After reaching the ship, you've got to destroy the power generators. Follow the rightward green arrow on the map over to them, jump any walls/gates/fences as needed, then punch out the generator in blue. Head back to the ship using the same path.
Upon returning, several frames attack. Likely, your squadmates will have caught up with you here, so finish off the frames as a team.
Not Jumpjetting aka "So, you like to do things the hard way?"
At the start of the mission, head towards the airfields. There's a gate blocking them, so swing to the left of it. You'll encounter some mild resistance from a few frames, but they should go down without much of a fight.
On the other side of the gate, there'll be a dirt ramp to take you up into the airfields. Cross the bridge and head the ship in the upper-right corner of the tactical map. That's the one, but it's got a security grid holding it down.
As you head towards the power generators, you'll pass by another gate that leads out of the airfields. There are two turrets around it, so take'em down. You'll likely run into several mounts of various sizes. You and your squad should be able to tackle them and stop them, figuratively. Keep strafing and tell your crew to attack the same target; no one gets out alive.
Near the power generators, it's the same story — another gate with two turrets. Snipe these turrets from a distance before they can get a shot on you.
See that generator glowing blue? Save some ammo by punch it to oblivion.
Oh no, a dropship appears. Prepare for some incoming frames and mounts. In fact, they ran into the generator fields during one of my run-throughs. Don't let them escape alive.
Next, back to the airfields, but oh no... The ship is leaving... And several frames show up to the party with no gift. As usual, make them pay.
Either Way
Last step: Time to get to this newly-arrived dropship. Follow the nav (use the green arrow leading to the left on the map I've provided). You'll probably encounter some mounts and frames on the way. Soon after, four or so frames will show up in a last stand. Peek over the side of the mountain and snipe them if you can. If they get close enough, let your squadmates have some fun by getting some shots in, too.
Head to the nav and the mission ends with a movie showing your crew departing Caprice.
20. Asteroid Shipyards
Description
Description
Search the shipyards for a vessel that can get us through the gate back to Terra Nova. There are a number of sentry drones patrolling the yards. Try to avoid them. They're unarmed, but they're sure to have friends around.
Background
Background
After days of searching the asteroid fields, we've located the NEC's shipyards. This is the primary repair facility for all ships in Caprician space. Most of the vessels at dock here are industrial ice haulers used in the asteroid mining operations that provide Caprice with most of its water supply. However, there should be a few gate-capable ships moored here. We need to find one that will take us back to Terra Nova.
Avoid the sentry drones and search the shipyards for a viable Gate ship. When you've identified one, Morgan will move in and get the ship running.
Debriefing
Debriefing
The Gateship we took is fully operational, and it's navigational systems were already set for Terra Nova. We must assume that the NEC Gatefleet was preparing to invade our planet. Our work has only crippled them temporarily. They will rebuild, and it won't be long before they are prepared for an assault on Terra Nova.
Now it looks like we've got a bigger problem. We'll have to track that asteroid's trajectory and see where it came from
You've got a ship, and though it was enough to get off of Caprice, it's not jump capable. Now, it's time to hijack a jumpworthy ship at the gate and get back to Terra Nova.
Objectives
- Avoid detection by the sentry drones
- Locate a gate-capable ship for the trip back to Terra Nova
- Protect Morgan while he works on the Gate ship
Walkthrough
Ugh... space.
To counteract my horrible lack of space fighting skills, I'm completely changing the build, dropping Fire Control to 1, so that I can pack an Anti-Gear Missile and a Heavy Pulse Laser Cannon. Mailliaux and Wallace are along for the ride.
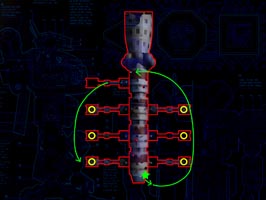
At the start of the mission, turn around 180 degrees. Essentially, the station is a long tube with several ships connected to the sides of it. In the map, the starting point is represented by the green star.
I'd cheat a bit on this one and do things out of order. Later on in the mission, you'll need to destroy the thruster modules on each ship (marked as yellow circles on the map). I think it's easier to take them out when you first see them. Head to the ship on the right, then destroy the three thruster module at the end (right side of map only). If you're in ammo conservation mode, punch it out or command your squadmates to attack for you. Personally, I think it's easier to tell the squad to attack while I mosey over to the next one and target it. Plus, it keeps your squad from hopelessly battle-charging any active turrets.
>This'll let the NEC know you're here, so now the turrets are active. Destroy them when you get the chance. This'll be fruitful as you won't have to deal with them later when your facing several frames.
As you get towards the end of the station, some maintenance bots are working on a ship — that's the one we want (upper left of the map). Destroy the bots (they'll probably go down with one shot), then there's a cutscene as Morgan goes to work.
Two frames (and maybe turrets) attack. Since I can't fight for shit in space, my suggestion is try to stay attached to the station. If/when the space frames get a lock, toggle on your ECM to escape it. If your like me and went with Anti-Gear missiles, the good news is they're guided. The bad news is that you'll need to be in active radar mode to use them. Once you get a lock, it's pretty much lay and spray, though.
After taking out the space frames, Morgan finish with the airlock. You'll need to destroy the rest of the thruster modules (the three on the left side of the map.) Do not destroy the thruster module on ship in the upper left of the map. You need that one to get off of the planet! While chasing after these thruster modules, use the same trick as earlier: Fly past, target, then let your squad tackle them. Also, do not engage any frames right now. If you do, more and more frames will appear...
When all six thrust modules are gone, you'll need to clean up and destroy any remaining frames. If you haven't encountered too many so far, you'll probably just need to destroy 2-3, then the mission's a success. Or as Mailliaux puts it, "Just another five minutes of senseless violence..."
The mission ends with a movie. An asteroid zips by, but why? Better find out where it came from.
21. Mass Driver Assault
Description
Description
Search the space station for an entrance. Be prepared for a fight. We'll deploy at the front end of the station.
Background
Background
In transit to the Gate, Morgan has used the Gateship's computers to crack the encryption on the data we obtained on Caprice. Apparently, 'Operation Brimstone' is an extremely large Massdriver the NEC has developed. They intend to use it to soften Terra Nova's defenses before they execute a full-scale invasion. The device is capable of accelerating large asteroids to incredible speeds and directing them accurately at targets parsecs away. Just a few of these asteroids striking the surface of Terra Nova will kill millions. In the chaos that follows, the nations of our planet would be ill-prepared to fend off an NEC invasion.
If we can't find a way to disable the space station, the devastation it will unleash on Terra Nova will be unimaginable. Cursory scans of the vessel indicate that it is fully manned and operational. Expect heavy resistance.
Debriefing
Debriefing
Well, you're inside the Massdriver. I'm not sure what you're going to do in there, but we're working on it.
Looks like the asteroids are being shot from a mass driver that's set to begin Earth's attack on Terra Nova. Time to find a way into the mass driver and put an end to this.
Objectives
- Find an airlock
- Get inside the space station
Walkthrough
This one's not too bad, except that it's in space. TV is up to 7k, so you might be able to splurge. I'm sticking with the AGM, though I think it's good to add something laser-y for sniping. If you go purely AGM, you may be able to bump the Fire Control back up to 2. Bring a couple of squadmates for good measure.
This is a mission where I wish the clipping plane in the game was way farther out. Head into the "barrel" of the mass driver and travel through it heading East. You'll encounter about three various frames spaced out along the way. Keep your distance, keep the radar extended and active, tell your squad to attack your target, and you should be able to take them out with little fuss.
As you approach the solid "base" of the mass driver, start to orbit/circle around it by walking on the thing, still heading east. You'll likely pick up some sentry drones on the radar, keep walking/orbiting around and eventually another ship, fully loaded, appears. Take down its lasers. As usual, find some cover and peek over the edges just enough to hit the turrets without them catching you. If an enemy gets lock on you, either retreat behind the cover or flash your ECM. There's a decent spot on the mass driver where you can catch the bottom three turrets. You may have to climb a little higher to catch the top.
Once the turrets are down, the entrance to the mass driver opens. Assault the sentry drones if you like, or just head into it to end the mission.
22. Mass Driver Destruction
Description
Description
Move through the maintenance tunnels and find the command computer and the asteroid. Once you've placed the nuke on the asteroid, we'll launch it.
Background
Background
You're equipped with a tactical nuke we found aboard the liberated Gateship. The NEC uses small nuclear devices to mine ice from the asteroids. It would take dozens of them to bring down a station this size, but we've just got the one, so you'll have to prove you're as clever as you are tough. I've cut into the station's maintenance systems, so I'll feed you more information as I come up with it.
Here we are: last mission. Nuke that asteroid and get the hell out.
Objectives
- Find the command module
- Place the explosives on the asteroid
- Get out
Walkthrough
This mission kind of sucks.
Back to HGLC for me. I like that there's no lead like on the projectile weapons and the rapid recovery time makes it easy to chain several shots in a row. TV is 7.5k , so crank things up where you can.
For the first part, fly/walk through a bunch of corridors that look the same. There'll be some sentry drones. Since your fire control and stealth are cranked, you'll catch them on the radar before they detect you. Hit'em with a laser and put them down.
When you reach the control computer, there's a mini-cutscene, then you need to find the asteroid. The astroid room entrance is directly below the computer room entrance. So, turn around to face west, then drop down. (If it's not there, go up instead.)
Walk in, touch the asteroid, walk out. Easy.
Now, here's the sucky part: You need to break this joint in three minutes. Everything I hate about navigating through space is here: Bizarre controls, spotty ground connection issues, controls that if you touch anything on the ground, completely leaving your gear motionless for a moment. Oh, and every room looks the exact same. Rant over. Honestly, with some practice, it's not too bad, as you can walk most of it if you desire.
Just go trace your path back... in less than three minutes. Otherwise, you go boom. (Though, if you destroyed the mass driver, wouldn't the mission still be a success? You know, for the greater good of Terra Nova? I digress.) If you're having trouble, here are a few tips:
- Set your self up for success: After you place the bomb on the asteroid, find the control computer room exit. Point and face westwards, then back up into the computer station.
- You can walk most of the way and still get back to the entrance. So, if you're like me and hate space travel, it's still doable.
- Forget nerves. Even walking, you can make back in about two minutes. During a few jumps, you may accidentally "stick" to the ground, but recovery isn't too bad.
- Lost? If in doubt, head west.
- Also, use the pictures in this walkthrough as a guide.
Get out. Boom (not you). The end.
Historical Missions
St. Vincent's War
Description
Description
We are approaching the wreckage of the St. Vincent. Forward recon indicates Confederated Northern City States forces may have beaten us to the vessel. Destroy any Northern forces you encounter. A convoy of trucks will accompany you to transport the medical supplies. Protect the trucks while the cargo is loaded and escort them safely back to the dropship.
Background
Background
The HCS St. Vincent crashed in the desert wastes of the Badlands. The ship was carrying large stores of valuable medical supplies. The cargo bays are crash-proof, so the supplies should still be intact. We know a detachment from the CNCS was dispatched to retrieve the contents of the vessel, and they've set up camp near the crashed ship. We'd like to hold out for reinforcements, but the Northern forces might move in and grab the supplies while we're waiting, so we have to move in now.
Debriefing
Debriefing
The Northern forces were driven from the field. The medical supplies are in our possession and are being moved to safety.
Defend the cargo convoy while it load supplies and escort it back to the dropship.
Objectives
- Protect the convoy
Walkthrough
This one's not too bad, especially considering escort missions are universally loathed in all of gaming. I used my 6K HGLC Dark Mamba build from the campaign mission. The default squadmates and their default gears came with me, which meant we were way the max threat value.
When you start, feel free to cruise 200-300 meters ahead of the convoy to get an early start on enemy activity. Extend your radar range and flash to active now and again to stay on top of things. You'll encounter some lights first and they should go down with just a couple of hits. After the second or third wave, the gears work up a class or two.
The worst part will be when you hit the loading zone. There are several gears and a few tanks, plus some turrets. To keep your teammates from suiciding by charging turrets, you'll want to take those turrets out from a distance before you get close. As the supplies are loading, the tanks'll come in.
Once the supplies are in, it's a nearly uneventful trek back to the dropship. I had a lone Cheetah try to pick a fight; it didn't last long.
Baja City
Description
Description
The CEF's defenses are crumbling, and we are preparing for a major assault on Baja. We believe a small team can penetrate the city and destroy the power transformers at the power station. This will cut the power throughout the city, cutting the CEF's communications and crippling their defensive systems.
Background
Background
During the War of the Alliance, CEF forces assaulted the Badlands city of Baja. The town's defense were quickly overwhelmed and the city fell to the massive CEF army. Combined Allied Southern Territories and Confederated Northern City States forces have attempted to retake the town for an entire season, but the CEF has held their position tenaciously. We have cut their supply lines, and they are beginning to weaken. Command believes it is time for the final push. You will be the first stage of the assault. Good luck.
Debriefing
Debriefing
Your team was successful in destroying the power transformers. During the blackout that followed, CNCS paratroopers dropped into Baja and recaptured the city.
Destroy the power transformers to cripple the city and the CEF's communications.
Objectives
- Destroy the power transformers
Walkthrough
Build wise, I went with my classic 5.5k Black Mamba sporting a VHAC and Fire Control 3. Really, pick whatever weapons you're comfortable with, but keep the fire control up to 2 or 3. I used the default squad with default gears.
This mission is pretty straightforward if you want it to be.
Put on some wheels, and start racing towards the nav point. You'll encounter some resistance along the way, but ignore it as much as you can. You might have to engage a gear or two, but generally, let your squadmates deal with it.
Race straight to the power plants, then destroy power transformers. That's it. Mission success.
Peace River Army
Description
Description
CEF forces have holed up in a firebase in a small box canyon. They have no escape routes, but their defensive position is ideal. Assault the CEF position and destroy the firebase.
Background
Background
For three cycles, an alliance of Terra Nova's northern and southern leagues struggled to expel CEF invaders from Terra Nova. In the autumn of 1716, the Badlands entered the conflict. The formation of a large army of Mercenaries under the banner of Peace River turned the tide of the war against the Colonial Expeditionary Force. As the Peace River Army advanced west, CEF forces slowly retreated towards their supply base, hoping to hold out long enough for reinforcements to arrive. A provisional CEF firebase near Lake Jakarta was completely cut off from the main fighting force but held out for several months due to the limited access routes their position offered.
Debriefing
Debriefing
The base lies in ruins. Well done. The CEF is on the run across Terra Nova. Soon our homeland will be free again.
The CEF has set up their base in a tricky location with plenty of fortifications, both natural and otherwise. Destroy it.
Objectives
- Destroy the CEF base
Walkthrough
If you like to snipe, maybe take something laser based. As usual, I took my VHAC with Fire Control 3. It's a little limited on ammo at only 100 shots. If you'd like more ammo, or if you like to snipe, an HGLC-based build would be good here, too. Beyond that, the usual suspects are along for the ride: default squad with default gears.
Here's a historical mission that could require a bit of strategy. A full frontal assault might work if you can handle the turrets. Very likely, this means the death of all of your squadmates, if not you, too. A longer approach, but more easily doable, is to take out the power structures, hit the com arrays, then attack the less defended base.
Start by heading northwest and use the walkthrough map to take a few bridges to the power structures by following the path on the left side. You may encounter some light opposition (infantry, tanks) along the way. Personally, I'd just run over the infantry; tanks will take some shootin'. If you're running a build with limited ammo, switch to your hands and punch down the power structures. Or, let your squad mates do the work.
After that, backtrack to the start of the level (marked with a star). Using the map as a guide, circle around the other direction following the arrow on the right. As before, there may be some light opposition to take down. This'll lead you to the com arrays. Punch'em down, too.
From here, you should have a pretty good shot at the base. Start by sniping any nearby gears or tanks to soften them up a bit. Try to remind your squadmates not to run directly into the base. If you can lure an enemy out, gang up on them and tell everyone on your squad to attack it.
Once you've got cleared the live units, head into the base (follow the short arrow on the map) and start punching down any building that has a proper name (not something generic like "structure"). Accelerate this by ordering your squad to attack as well. Once you've got an adequate number of buildings demolished, the mission ends.
March on Massada
Description
Description
There is a small Blue Angel squad guarding a canyon pass to the north. The gates to the city of Massada are just beyond their position. Destroy the gates and the city is ours.
Background
Background
The Blue Angels, an elite regiment of the Norlight First Division, has been stationed just outside the mesa city of Massada. We have a large tank force waiting to assault the city, but the tanks are having difficulty maneuvering in the narrow canyon pass outside the city, and the Blue Angel Gears are tearing us apart. Break through the Gears and bring down the city gates, and we'll bring in the primary assault force.
Debriefing
Debriefing
The city gates have been destroyed. Massada is at our mercy. Good work.
Walk down the opposition and destroy the city gate.
Objectives
- Destroy the city gates
Walkthrough
As usual, I'm sticking with my goto build: Dark Mamba with a VHAC and Fire Control at 3. Also, I'm bringing along the default squad and default gears; there's enough threat value that you can beef them up a bit if you want.
This one is just all out combat. Take your favorite 6k combat setup, then destroy everything you see along the way to the city gate. You'll encounter several gears and quite a few turrets. Fortunately, the turrets tend to go down pretty easily here. Mind them, focus fire by telling your squadmates to attack your targets, avoid any critical hits, and you'll have it in the bag.
Last step: Shoot at the gate until it pops.
Escort Adrianna Xing
Description
Description
Long range recon has spotted several squads of NGIS Gears moving quickly toward our position. Their motives are unknown, however they have assumed a standard skirmish formation and are running passive sensor systems only, so we must assume they are hostile. Abandon the camp and escort Xing to the extraction point immediately.
Background
Background
Adrianna Xing, 'The Apostle of Mamoud', is leading a caravan of pilgrims through the Badlands to the holy city of Massada. Norlight has assigned your team to guard the apostle. Xing has opposed the escort, claiming that she is on a mission of peace and will not be harassed. However, she fails to appreciate the charged political atmosphere she is caught up in. Although we are unsure of their motives, we have reason to believe NGIS forces will attempt to assassinate Xing.
The pilgrims had set up camp for the evening, but NGIS Gears are advancing on the camp. Break camp and move out. A recovery team is waiting at the extraction point to airlift Xing to Massada. Get her there safely.
Debriefing
Debriefing
The apostle Xing has been safely evacuated and will be moved to Massada by plane.
Defend "The Apostle of Mamoud" from assassination as she and her pilgrims travel to Massada.
Objectives
- Protect Adrianna Xing
- Escort Xing to the extraction point
Walkthrough
Really, this one is not too bad. As usual, I'm bringing my VHAC Dark Mamba with the default squad in tow. Though, you may want something with a little more ammo. (HGLC or HAC might be alright.)
Play this one on skates. Throw on your SMS, keep the speed up, and shoot whatever comes nearby. Tell your squad to attack the same targets and you'll have no issue. Well, ammo count might be a little low with just the VHAC, but you can bring a weapon with more room if you like.
Your nav point is set to Xing, but if you press N, you'll briefly see the distance to the destination, which is about 3km out. Feel free to venture ahead of the Xing convoy about 200m or so, but keep an eye on the radar — the convoy does make a few unexpected turns and you don't want to abandon it for long.
Generally, enemies attack one at a time. Towards the end, you may get a couple two-at-a-timers, but with a full squad, the numbers are in your favor.
If you see an airplane in the distance, the end of the mission is near.
Assassination
Description
Description
We are expecting the First Cadre to move Colonel Barth through this canyon. There's an airfield to the northwest. A dropship is already en route to evacuate Barth. We cannot intercept the dropship in time, so you must find the Colonel and his escort and stop them. You are authorized to use lethal force. Do not allow Barth to reach the airfield alive.
Background
Background
During the early months of the War of the Alliance, CEF forces seized the city of Saragossa. The city was not liberated until the final days of the conflict. The CEF division commander garrisoned in the city was Colonel Santine Barth, also known as the Saragossa Butcher. Tens of thousands of Saragossa's citizens were reportedly killed in public executions that Barth conducted in the city's amphitheater. As part of the treaty that ended the war, the CEF agreed to turn over a number of their officers who were alleged perpetrators of war atrocities. The most prominent of those accused was Barth. Before he could be taken into custody, Barth fled with a small detail of his elite First Cadre. For several months Barth disappeared, and many believed the CEF had secretly evacuated him. However, a Norlight outpost in the Whitetop Range has intercepted a communication they believe to be from Barth. He is heading for a small airport near the northern pole of Terra Nova. Your team of Norlight Gears has been air-dropped into the area to cut him off.
Debriefing
Debriefing
Barth has paid for his crimes. Well done. Due to the covert nature of this assignment, we won't be able to present you with the commendations you deserve, but rest assured your work has not gone unnoticed.
Barth led public executions that killed thousands. Time to return the favor: Kill him.
Objectives
- Find the vehicle transporting Barth and destroy it
Walkthrough
Grab a sniper build... or be like me and use the standard Dark Mamba with VHAC and Fire Control 3. Skip the squad.
Head into the level, move slightly northwest, then find a rolling hill. Basically, look for the nearest hill you can climb. A massive group of gears will come through. Unless you're looking for a challenge, do not engage them. Instead, lie prone and wait as they pass by. Keep cycling through your targets until you find the Javelin. That's the vehicle with Barth. In my case, it was lagging behind the pack of gears. So, exercise a bit of patience, wait for them to pass, then snipe the Javelin. Mission accomplished with just a few shots.
Hades Commando Raid
Description
Description
Enter the Hades Complex and recover the illegal biological agents. When you have them in your possession, move to the airfield. Once you have delivered the canister, defend the aircraft until it escapes the area. These agents are lethal and very unstable, so protect them from weapon fire.
Background
Background
The Southern Republic Army is sending you to Bethany to investigate biological research by the Bio-Warfare Corps. Their research at the Hades Complex is reportedly in violation of several global treaties. Move into the compound and seize the canister of biological agents.
A Legion Noire squad has been illegally contracted by Bio-Warfare to defend the facility. The Legion Noire Gears are operating as mercenaries in an unlawful capacity, and you are authorized to use lethal force if they offer any resistance.
Debriefing
Debriefing
The canister containing the bio-agents was delivered to the aircraft and safely airlifted out of Bethany. The Bio-Warfare Corps will pay for their crimes. Arrest warrants have been issued for a number of scientists and administrators involved with the corporation.
A canister of illegal biological warfare agents is being stored at an airfield. Get it out.
Objectives
- Recover the biological agents
- Bring the canister to the awaiting aircraft
Walkthrough
So... I've been debating the best way to tackle this. If you just want to complete the mission, I think the best bet is to speed run it. With that being said, I'm still bringing my typical VHAC with FC3 setup. Whatever you do, crank your stealth, bring some ECM, and make sure you've got the speed topped off. The standard squad is coming, too, mostly to be a fire support distraction.
When the mission starts, engage your SMS and active radar, then head north towards the Hades Complex nav point. Soon, you'll get some hits on the radar for hidden turrets. Engage the ECM, then run like hell to the nav. Don't stop moving, head to the second nav which will take you right to the cannisters. Get near them and you've collected them.
Immediately head for the exit at the Airfield nav; you'll need to veer right a bit to make it up the hill. There's a small gate (like you need to pay for parking) that I always get hung up on. Go just to the right of it and you'll soon see an air plane. Get to the plane and the mission's done.
The Crossroads
Description
Description
Attack the marauder position on the hilltop and force them out.
Background
Background
The primary trade route between Kossuth, Sesshu, and Zagazig has been captured by marauders. They control the hilltop position overlooking the junction of the two main roads. All caravans moving through this area in the last few months have been looted. The hilltop offers an ideal defensive position and is well fortified. Attack the hilltop and eliminate the pirate marauders. An intercepted radio transmission indicates that the marauders have reinforcements on the way, so move quickly.
Debriefing
Debriefing
You defeated the marauder forces. A company of Norlight troops will be garrisoned on the hill to assure the trade routes remain open.
Destroy the marauder camp and take out their reinforcements.
Objectives
- Eliminate the marauders
Walkthrough
As usual, I'm sticking with my VHAC Dark Mamba with Fire Control 3. The default squad and their default gears are with me.
For a little assist, sneak up on the marauders and take out their defenses: Head west through the forest and swing around behind the marauders' base. Flash your active radar for a moment to capture the enemy units, then target the APC. Destroy it and their turrets go down.
Likely, once the APC goes down, you'll have their attention. Charge in from the the rear and start blastin'. A few gears later, destroy everything in the base.
From here, 5-6 gears kind of hodge podge their way in, mostly from the North. Take'em out as they appear.
Last update: 3/15/25
Created:2/17/25

